

These adorable clay rainbow ornaments are a fun craft that does double duty as a treasured keepsake to bring out year after year. They’re the perfect decorations to add to your Christmas tree or to hang up in your windows to inspire a feeling of community. Consider making and giving them as a year-end gift to all of your neighbors!
Supplies
You can find all the supplies to make this project at your local craft store or on Amazon. Polymer clay comes in blocks divided into sections. You can make three large ornaments from one block of white clay.
- Polymer clay in white and three other colors
- Rolling pin
- Silicone rolling pin guide rings (optional)
- Clay extruder tool (optional)
- X-Acto knife
- Pen or pencil
- Flat-back pearls in mixed sizes
- Glue
- Twine or ribbon
Instructions
- Condition white polymer clay by kneading it with your hands until it becomes soft and flexible.
Tip: Make sure your work surface is as clean as possible to prevent debris from sticking to the clay while you’re working with it. - Once your clay is conditioned to the point that it no longer crumbles, use a rolling pin to roll the entire block to an approximate ¼-inch thickness.
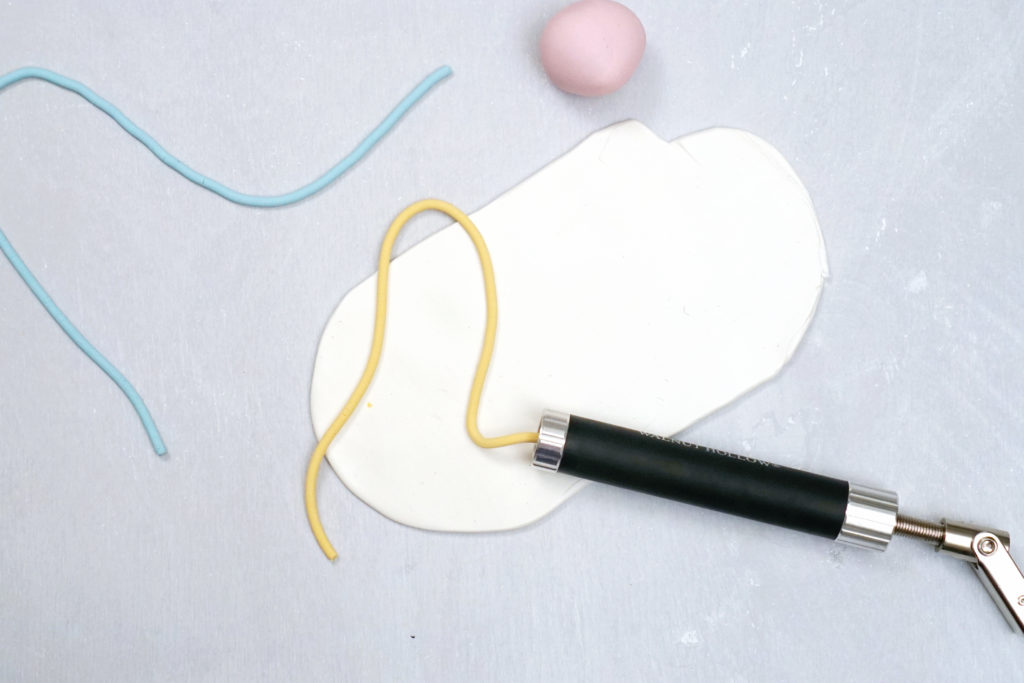
Tip: You can use silicone guide rings to help you. Slide one ring onto each end of your rolling pin to make the final thickness as perfectly uniform as possible. - Roll three additional colors into long, thin “snakes.” A clay extruder can help you create perfectly smooth and even stripes, tubes and more.
- Beginning with the innermost color of your rainbow, cut a small piece off the colored clay snake using an X-Acto knife. (Note: Do not allow children to cut with the X-Acto knife. Adults should perform all cutting required.) Gently lay the colored piece of clay onto the white clay and bend it into an arch. Bend another arch around the first, leaving a bit of space in between. Repeat with the third color.
- Use the rolling pin to gently flatten the colored stripes, pressing them lightly into the clay. They don’t need to be completely flat, but they shouldn’t poke up too much when you’re done.
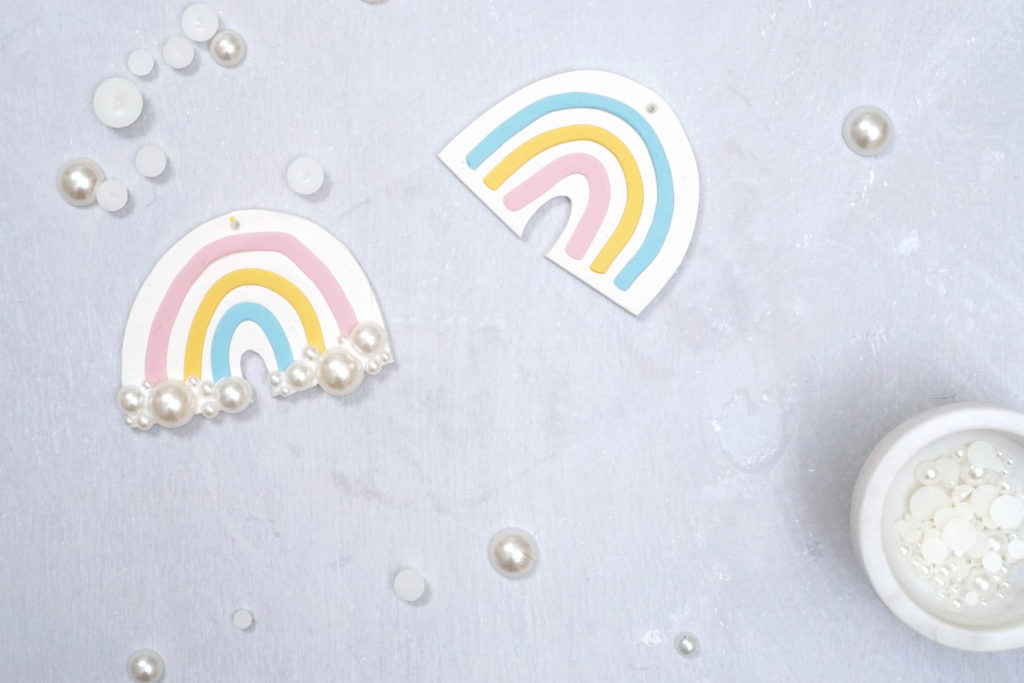
- Cut around the rainbow with the X-Acto knife, leaving a generous white border. Use the end of a pen or pencil to poke a hole at the top.
- Preheat the oven to the temperature indicated on the package for your clay. This temperature can vary based on the type of clay you are using.
Tip: Using an oven thermometer is highly recommended. If you bake the clay at too low a temperature, it won’t fuse properly. Instead of being strong and flexible, your ornament will be brittle, breaking off with the slightest pressure. - Bake the ornaments in an ovenproof glass dish or a baking sheet lined and tented with aluminum foil to prevent the ornaments from burning. Bake for 15 minutes longer than the package suggests to make sure your clay is completely fused. Remove ornaments from the oven and allow to cool completely. (Note: The clay doesn’t set until it has completely cooled.)
- Apply a generous amount of glue to the bottoms of each rainbow. Press the flat-backed pearls in a random arrangement to look like clouds. Let the ornaments dry overnight.
- Thread a length of twine or ribbon through the hole at the top of the rainbow ornaments. Hang them in a window or on your tree.
A version of this story originally appeared in our December 2020 issue.


