

Make a memory this Mother’s Day with a craft that’s fun for all ages. This month, make painted figurines of both parent and child using a kid-friendly clay substitute that’s easy to handle. The completed figurines can be used as dolls or decorations!
This craft is not recommended for children younger than 3 years old.
You will need:
- 4-ounce packet of Crayola Model Magic
- 3 or 4 colors of acrylic paint (including hair, skin and clothing colors)
- Paintbrushes (including a fine tip)
- A cup of cold water and a paper towel for cleaning brushes
- 2 toothpicks
Step 1: Getting ready
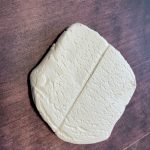
Gather all of the above supplies and clear a space on the countertop or table. For the Model Magic clay, you’ll want a smooth, clean and hard surface to make rolling easier. Do not open the paints yet.
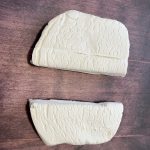
Step 2: Dividing up the clay
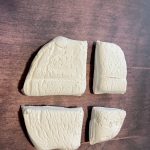
Divide the clay so that the “mom” piece is twice as large as the “child” piece. Any children participating in the craft can start working with the child piece to get familiar with the clay. Next, take one third of each piece and separate it from the main lumps, as pictured. These small segments will become the figurine heads.
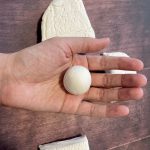
Step 3: The head
Mold the head segment into a ball shape with your fingers. Then, roll it in your palms or against the hard surface to smooth out any odd pinches or lumps. When you have a nice sphere, set it aside.
Step 4: The arms
The arms will be simple. For this step, you’ll want a long, thin piece of clay. Take a piece about half the size of the clay used for the head and roll it flat on the table until it resembles a worm. If your worm ends up too short, roll it until it is longer. If your worm appears too long, you can either mash it up into a ball and roll it again or pinch some of the clay off the ends.
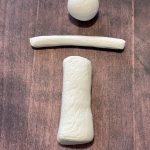
Step 5: The body
Mold the main body piece to be a long tube. If you want your figure to wear pants, divide the bottom part to about halfway up the body piece. Then, roll each “leg” between your fingers to give it a rounded shape.
Step 6: The hair
Depending on how much hair you or your child have (and the style of hair), you will need different amounts of Model Magic. Mold the hair into shape around the “head” piece, but leave space for the neck. If your figure has longer hair, it will add stability to the final figure.
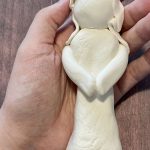
Step 7: Assembly
To assemble your figure, place the arm segment behind the main body so the sides are equal lengths. Then, press to blend the pieces. To attach the head, use the toothpick to push one end into the body piece where the neck would go and the other end into the “head” piece. No part of the toothpick should be visible. Press any pieces of the hair not against the head to the body for added stability. Before setting your figure out to dry, stand it up and gently press the “feet” to the flat surface.
Step 8: Drying
If your figure doesn’t stand on its own, prop it up against something so that it dries in the vertical position. Allow at least 24 hours for the Model Magic clay to dry completely.

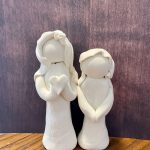
Step 9: Painting
Once your figurines are dry, use the fine-tipped brush and paint for details and edges. When changing colors, rinse the brush in cold water. (Hot water can melt the glue and cause bristles to fall out and get stuck in your work.) Allow the paint to dry.
Ta-da!


