

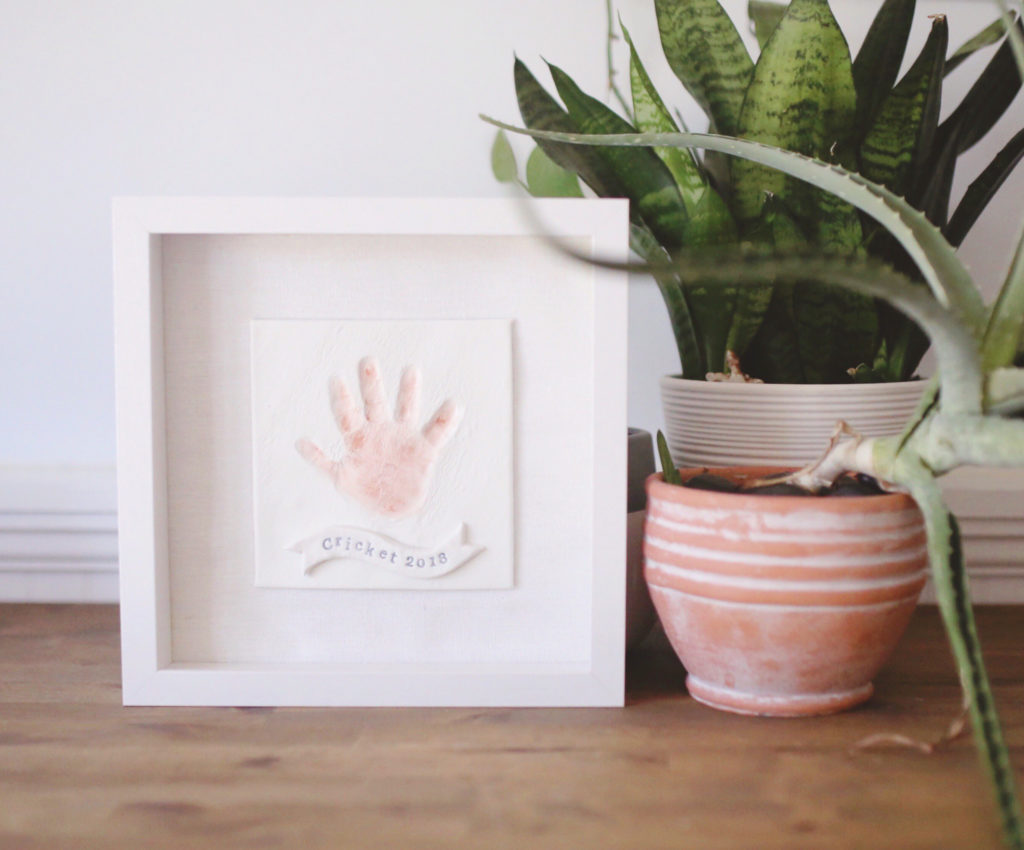
Everything may feel different and uncertain right now, but one thing hasn’t changed: Parents still want to preserve memories of their little ones. A clay handprint in a frame is an easy keepsake to make for Father’s Day or to mark any milestone moment in your child’s life.
Best of all, you don’t even need a special handprint kit. It might be hard to track down certain supplies like toilet paper and Clorox wipes right now, but as long as you can get your hands on (pun intended!) a package of air-dry clay, you’re pretty much set.
You can even wait to shop for the perfect shadow box until things settle back down. Your child’s clay handprint will look adorable propped on a shelf in the meantime.
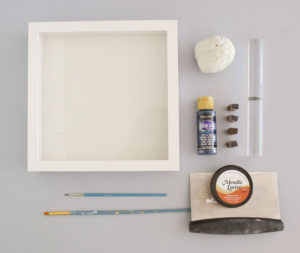 Supplies:
- Air-dry clay
- Clay roller or rolling pin
- Parchment paper or silicone mat
- Bench scraper or kitchen knife and ruler
- Alphabet stamps
- 2 thin paintbrushes
- Dark acrylic paint
- Metallic wax paste
- Lint-free cloth or paper towel
- Strong glue, such as E6000 or Power-Tac
- Shadow box
Instructions:
1. Using a clay roller or rolling pin, roll out your air-dry clay to a uniform 1/4-inch thickness. Use parchment paper or a silicone mat underneath to prevent the clay from sticking when you eventually peel it off.
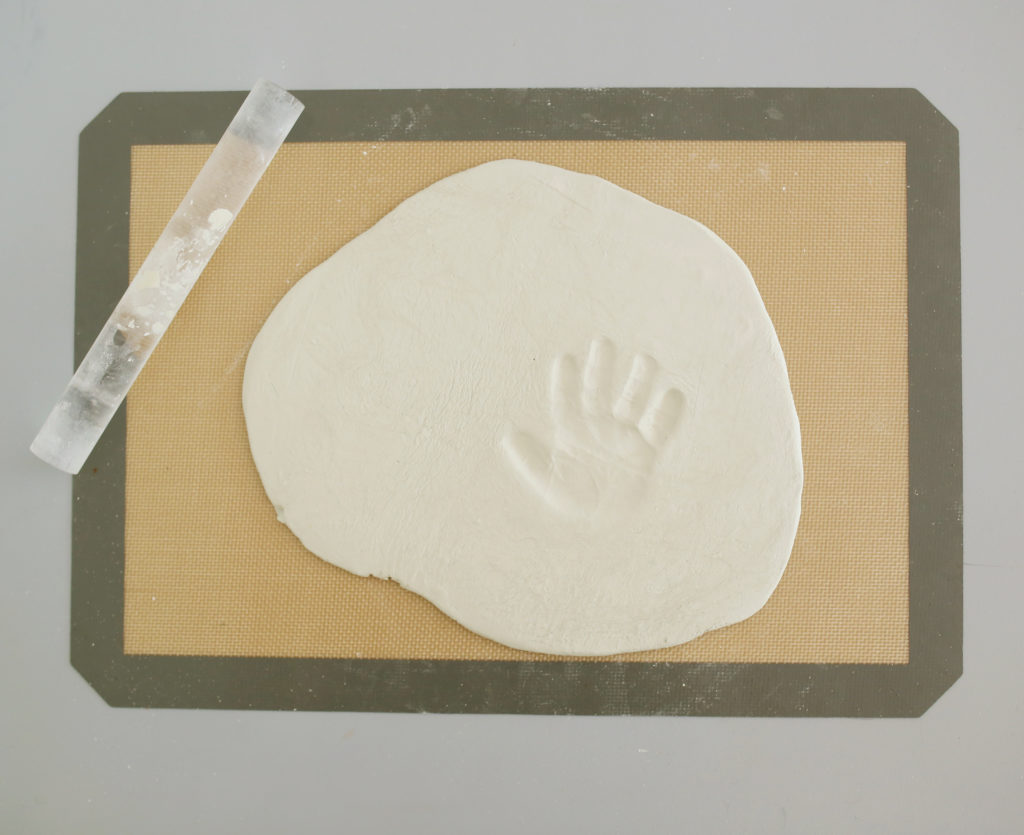
2. Help your child press their hand into the clay using gentle and even pressure, being careful not to press their hand all the way through the clay. Lift slowly to remove.
3. Cut a square or rectangle around the handprint using a bench scraper or kitchen knife and ruler to create a panel.
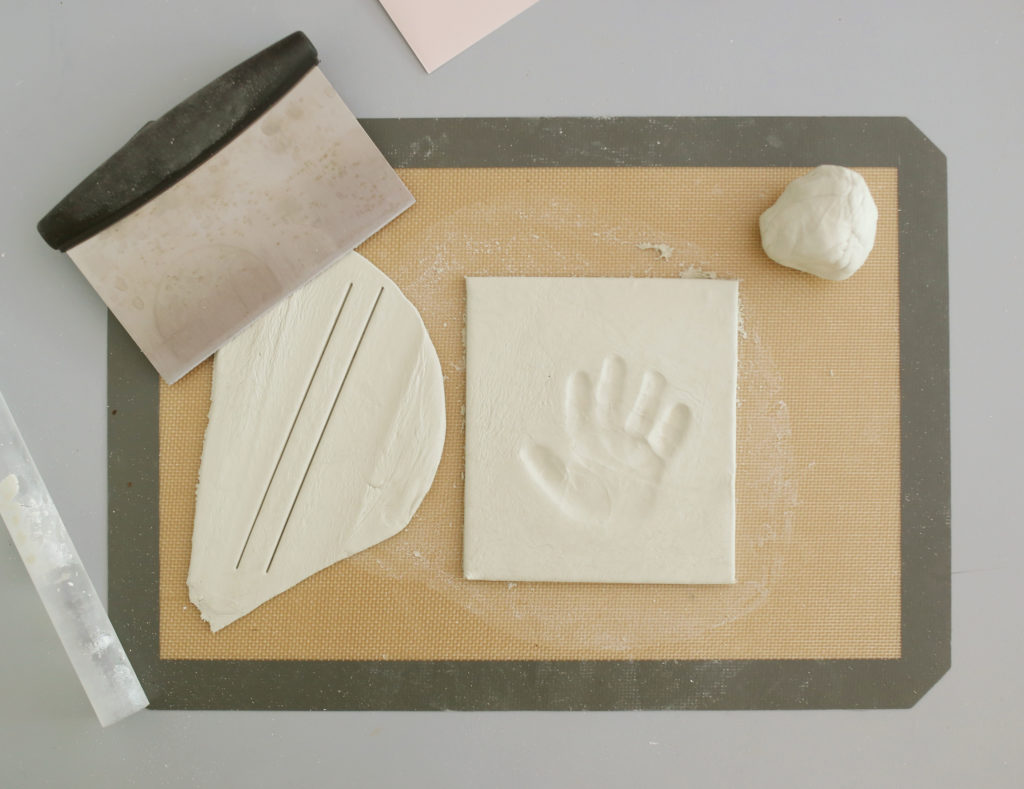
4. Roll out a small piece of air-dry clay to 1/8-inch thickness and cut out a long rectangle using your bench scraper or knife and ruler. Set aside clay scraps.
5. Gently press alphabet stamps into the rectangle to spell out a name, date or a cute memory. If you don’t have alphabet stamps, use something with a fine tip, such as a mechanical pencil without the lead, to carefully write the letters by hand.
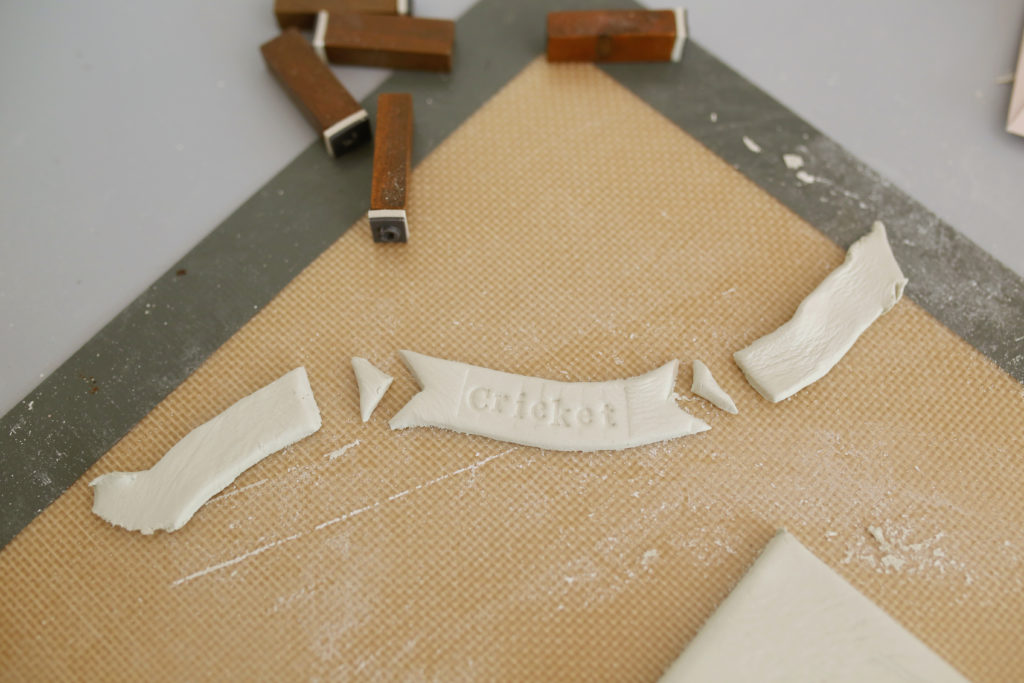
6. Slowly bend the rectangle into a banner shape like you see in the picture, cutting a triangle out of each end.
7. Set aside the handprint panel and the banner to dry completely overnight.
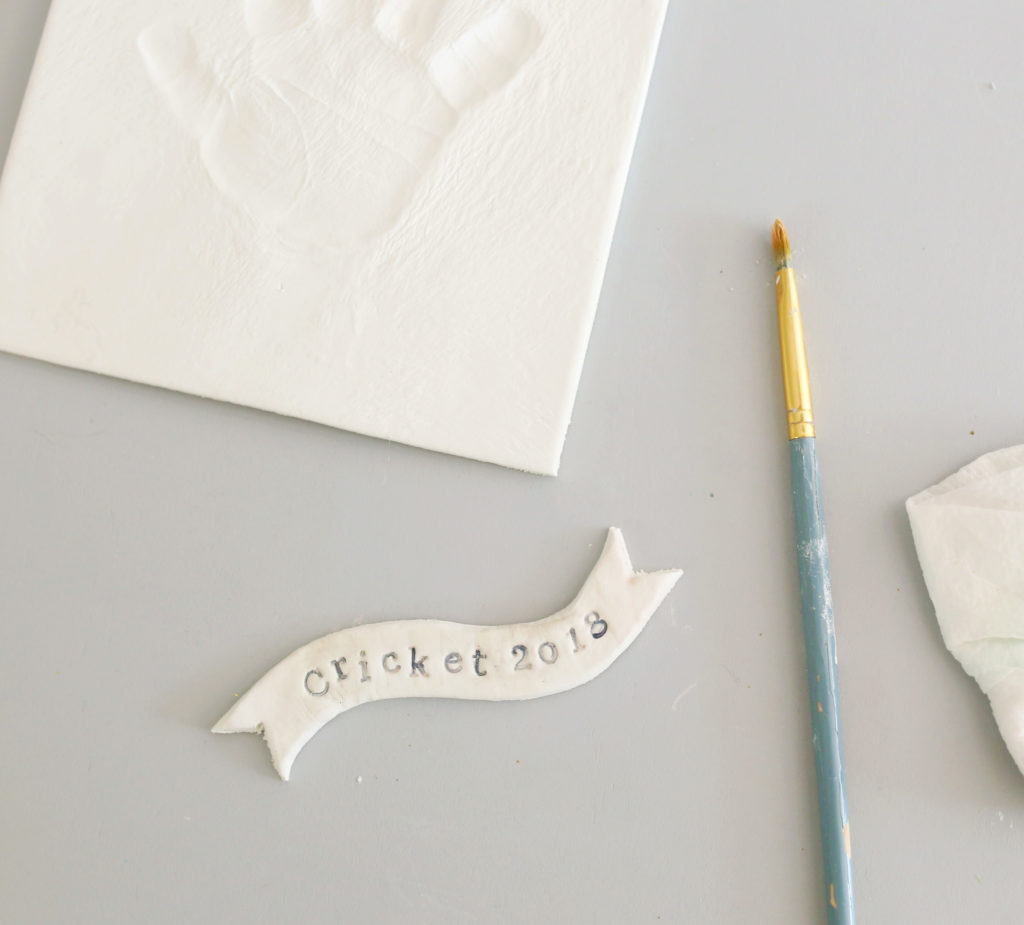
8. In the morning, check that the clay is hard and dry all the way through to the back. If not, leave it out for another 12 hours before checking again. You shouldn’t see any moisture underneath.
9. Use a thin paintbrush to fill in the letters of the banner with dark acrylic paint. For a watercolor effect, you can dilute the paint. Wipe away mistakes with a damp paper towel or lint-free cloth.
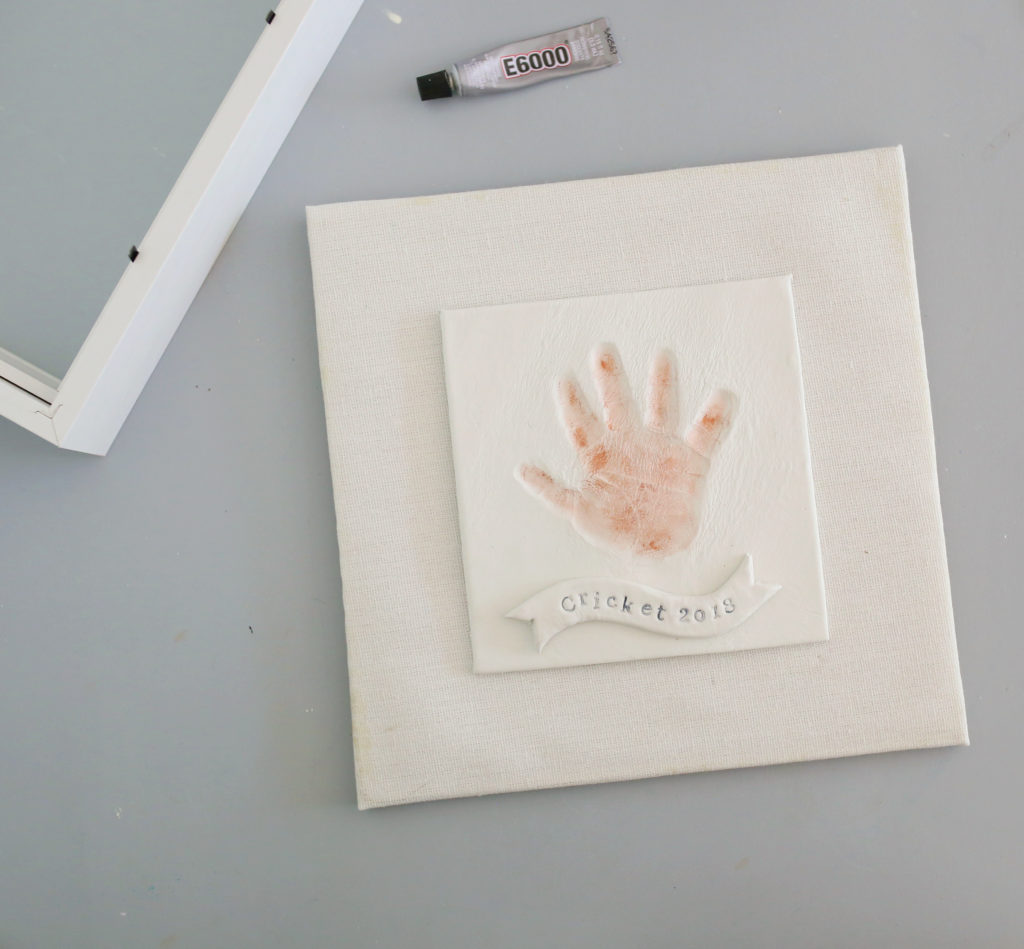 10. With a dry paintbrush, apply metallic wax paste or metallic acrylic paint inside the hand print so that it stands out. Buff away any excess wax or paint with a clean, lint-free cloth.
11. Glue the banner to the handprint panel and the handprint panel to the back of the shadow box. I recommend a strong industrial-strength glue for long-term durability. Let the glue dry overnight before assembling the shadow box frame.
Looking for more craft projects? Try this summer-themed Butterfly Sensory Bin!
A version of this article appeared in the May 2020 issue of Washington FAMILY.


