Going back to school is an exciting time, but it can make anyone a little bit nervous. One way to help kids put their worries aside is to help them take ownership of the experience with a hands-on activity like picking out a backpack, choosing their notebooks or even making their own school supplies.
We chose to make bookmarks because reading opens doors to learning about just about everything. Encouraging your child to read stimulates imagination, memory and language skills.
This special back-to-school DIY will guide you and your
little one(s) through making personalized subject bookmarks
in just five steps.
Here’s what you’ll need:
Shiny, decorative cardstock paper
Regular scissors
Funky scissors
Colorful thread or cloth ribbon
Scrapbooking stickers
Ruler
Pencil, pen or other writing utensil
Single-hole punch
Optional: beads
Step 1: Lining it up
Use the ruler to make two marks on the cardstock paper, about an inch apart in pencil. This will be how thick your bookmark is. For length, you’ll want to make the segment 5 inches long.
Tip: Let your child pick the color they want to go with each subject. Most children like to associate a specific color with a subject—but this varies!
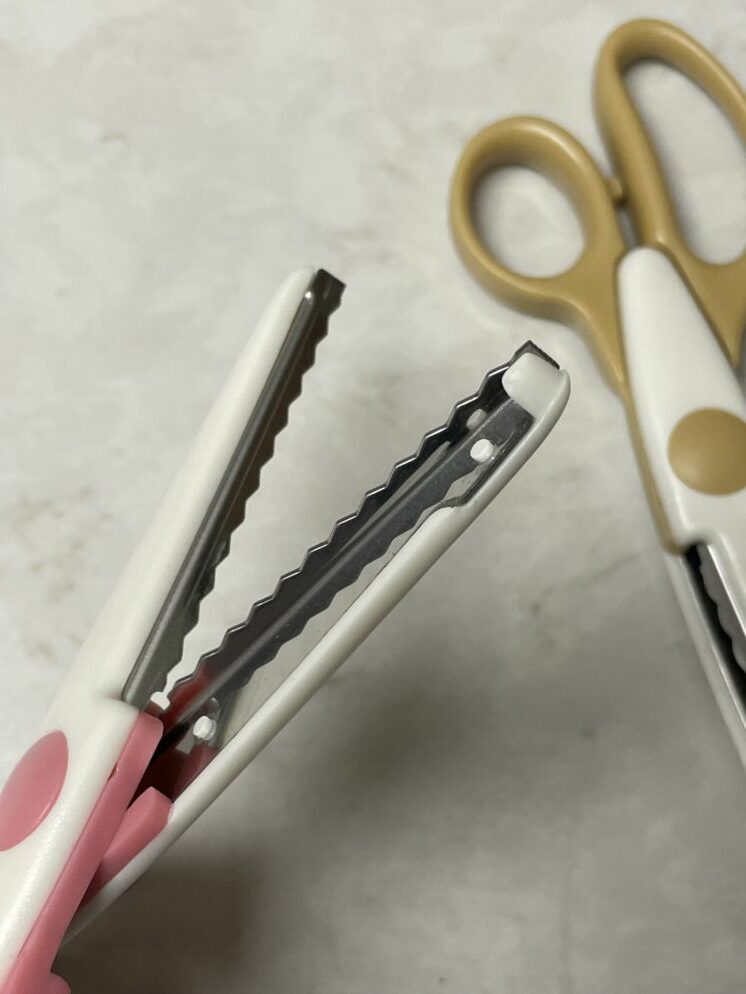
Step 2: Snip, trim, punch
Using your regular scissors, cut out the rectangle you made in Step 1. Choose one end of the rectangle and punch a hole in the last square inch, as pictured. Next, use your funky scissors along the edges to give your rectangle an eye-catching edge.
Step 3: The tail
For this step, you’ll need your cloth ribbon or colorful thread. Try to pick a color complementary to the color your child picked for the paper. Measure out an 8-inch-long segment and cut it. Pinch both ends of the cut segment together, so one end becomes a loop. Pull the loop through the hole at the end of your bookmark, then tuck the two trimmed ends of the thread or ribbon through the loop and gently pull it tight.
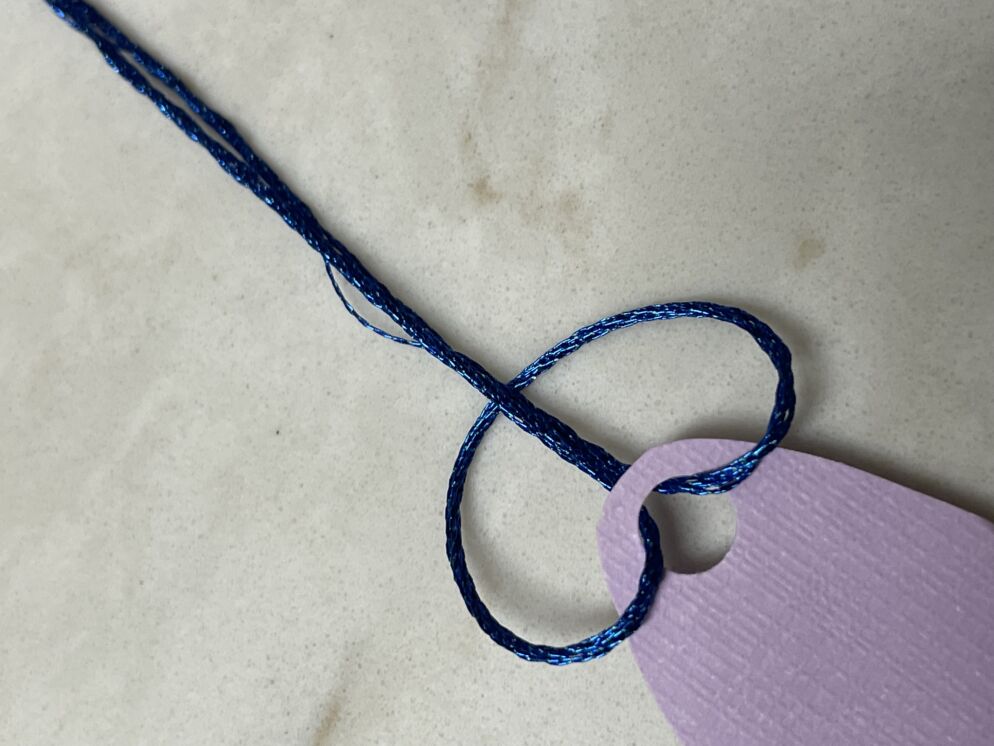
Tip: If your ribbon or thread is too firm, it may start to slide. Fix this by either carefully tying a knot or using a small bit of glue and pinching the ribbon/thread together until dry.
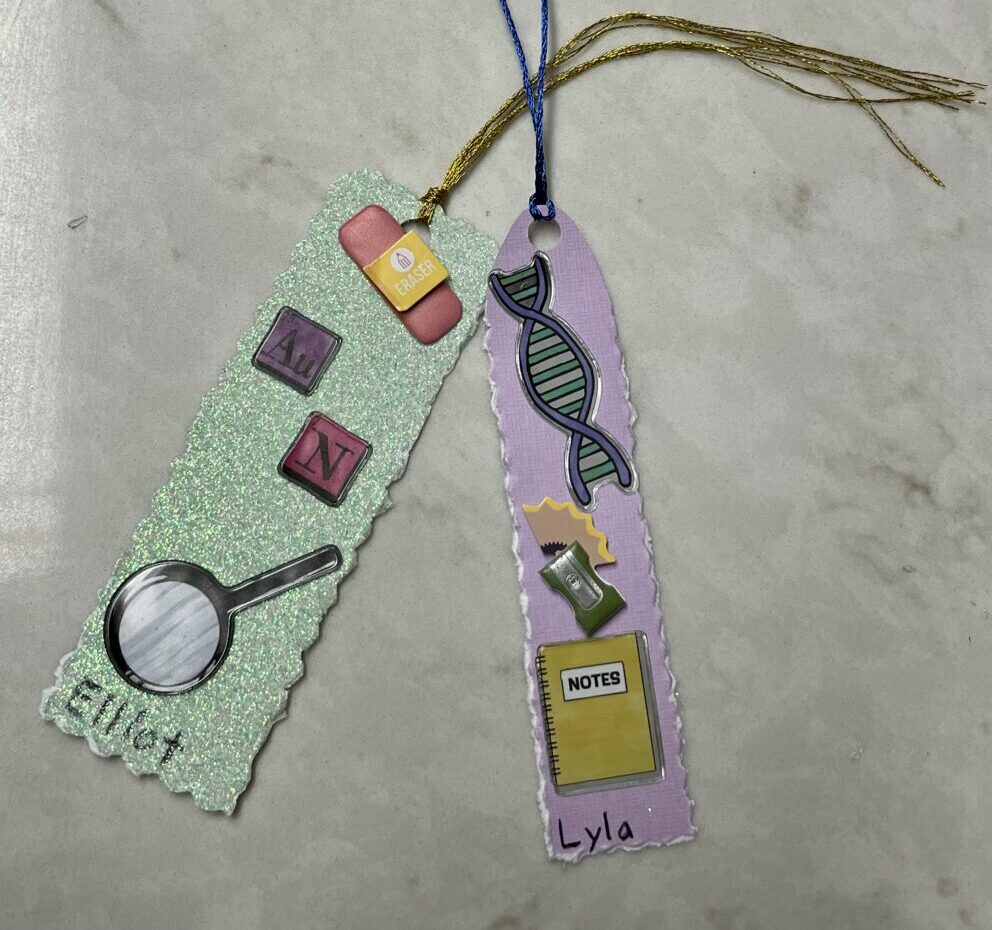
Step 4: Personalize!
We found a broad selection of subject-specific scrapbooking stickers at Michael’s. To get
yours, visit in store, shop online or check your local craft store. This step can be hands-off for parents. Let your child take the lead and decorate their bookmark to their heart’s content! Just keep an eye on younger siblings to make sure stickers don’t end up where they shouldn’t.
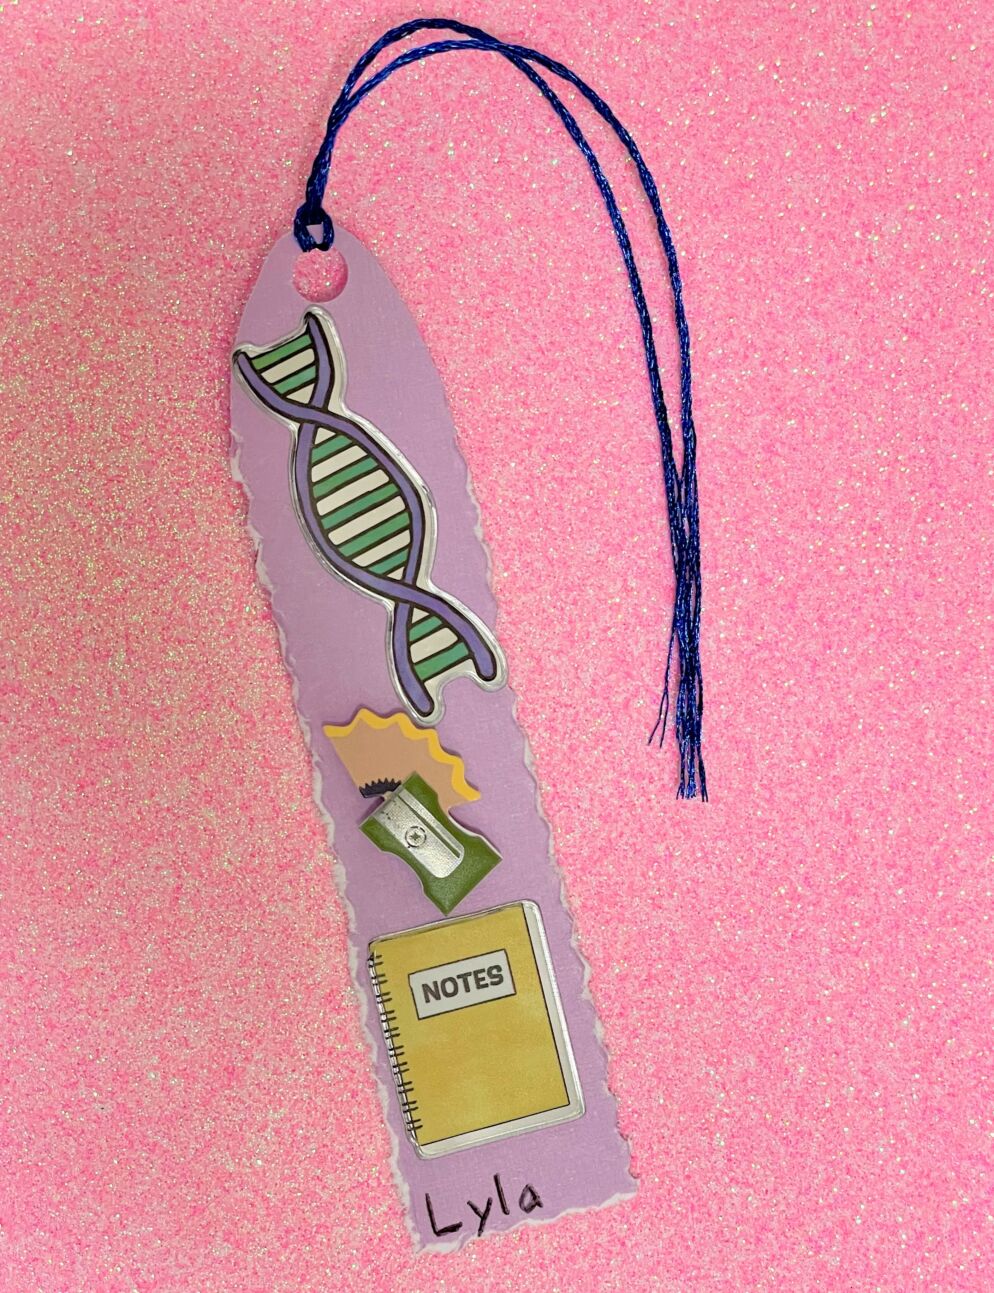
Tip: If your chosen paper is textured on one or more sides, a little glue or double-sided tape can fix any sticker-sticking problems you may encounter.
Step 5: Test it out
Crack open a new book or an old favorite and test out your new bookmark with a little late-summer reading. It’s a great way to look forward to the new school year!


 through making personalized subject bookmarks in just five steps.)